
INSTRUCTIONS using cassette tape
If you wish to have a TAPE copy of DH, I am willing to do so, but it is a time consuming process. It is possible to reconstruct a tape copy using the TAP file in the Download section (convert the TAP to WAV, then you will need a USB device to export the WAV to a tape media at 1:1 real-speed; even then the result is not guaranteed to work). So it would be some cost for me to prepare a TAPE copy: leave a comment of your interest or contact me at “contact dot steve dot usa AT gmail dot com”
DOWNLOAD (ZIP)
DOWNLOAD (TAP, “tap” is the file extension used for a “tape recording” – it is actually a text file, you can open and look at the contents; WINE is able to process this format, or other tools can be used to export the TAP back to a cassette tape)
After you have an actual TAPE copy of DH, here are steps to load and run it on the PET:
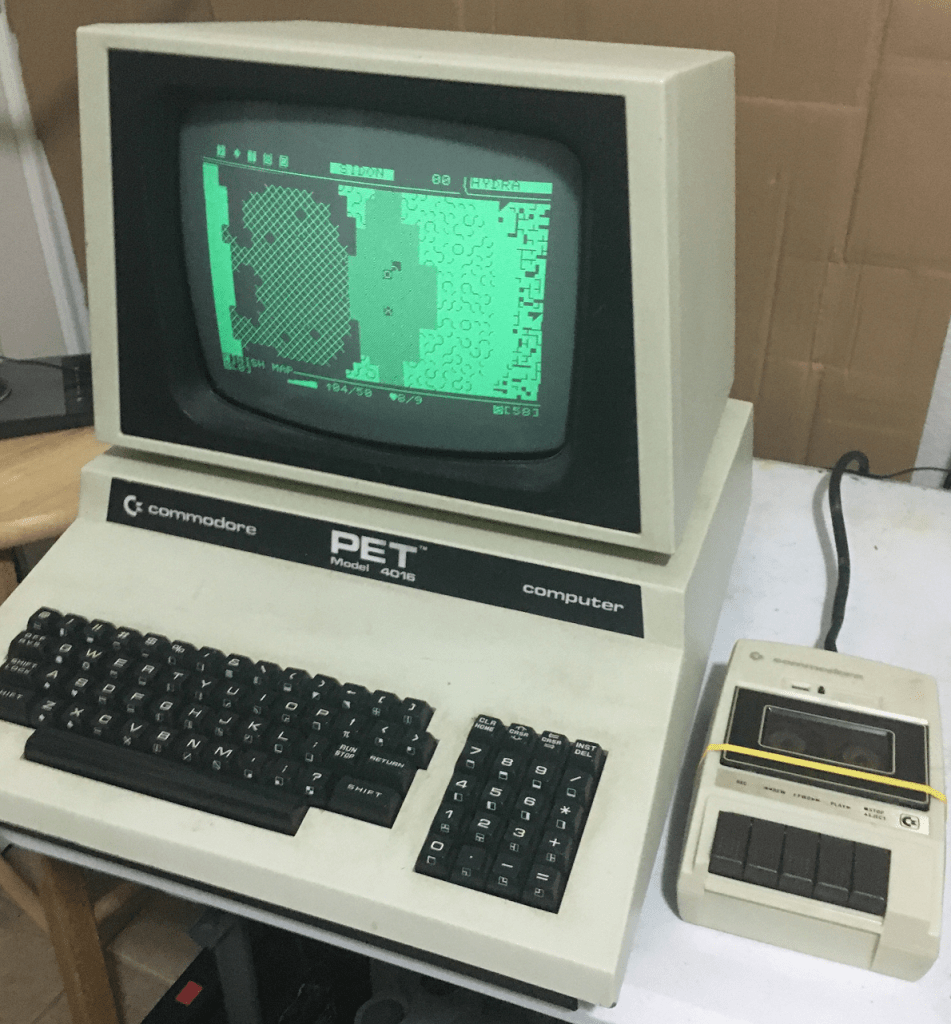
- Connect a compatible Commodore PET tape drive (typically a single connector at the back right; most PETs will also have a 2nd tape adapter on the side). There are several types of cassette tape units: One is the older/longer unit (that comes in black or white, with the black version being the same as what came with the original PET 2001 installed next to its keyboard), and there is a newer slimmer unit that is generally easier to find (as it was more popular with the Commodore C64). Either type can work with the PET.
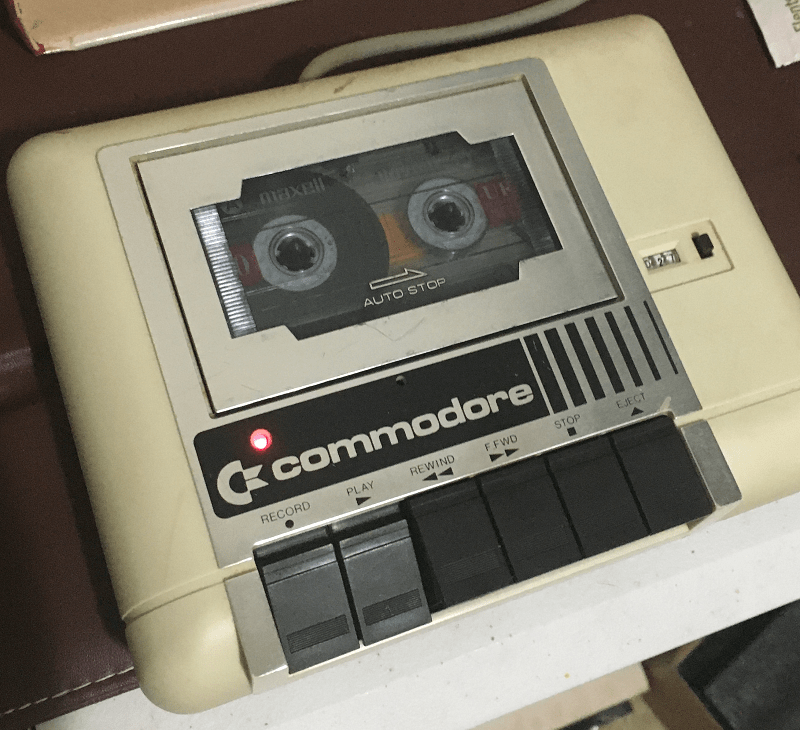
(that’s why RECORD and PLAY are both pressed and the red light is on)
- Insert the tape containing the Destiny Hunter program, being sure to place the correct Side A or Side B up (typically Side A, it is usually indicated on the label of the tape).
- Power on the Commodore PET. You will not be able to FWD/RWD on the tape cassette unit until it has power.
- Rewind the tape to the beginning (REWIND or RWD button), until it stops on its own. The program does not have to start at the beginning of the tape, just typically it is. The tape itself (or its case) may have a label or notes indicating the “offset” of where the program begins (e.g. “80”, “120”, “210”, where you FWD from “000” in the dial on that tape up to that offset).
- HISTORICAL NOTE: Cassette tapes were in use (for computers) from around 1976-1982. Before that time, actual rolls of punch paper were used (original MicroSoft BASIC was on such a paper!). Such rolls had been used for decades (effectively being narrow versions of the old player-piano rolls, where the music they played from holes in paper was effectively an encoding of instructions). After around 1982, disk drives were finally more reliable and affordable for home usage. Disk drives lasted until about 1996 (going from 8″, 5.25″, 3.5″ formats), when CD-ROMs likewise became more reliable and affordable (also shrinking from 12″ to 4.25″ formats). These disks have essentially disappeared, replaced by “USB thumb drives” or network-streamed data.
- On the Commodore PET, type the command LOAD <RETURN>
- On the screen you are prompted to press PLAY, so press the PLAY button on the cassette tape drive unit
- The Destiny Hunter program is a full 32K, so at approximately 60 bytes per second, it will take several minutes to load (there is some header and associated information, about 9 minutes is normal). The dial counter on each cassette drive maybe out of adjustment and not quite accurate, but the counter should reach somewhere between about 120-190 once the program is fully loaded from the tape.
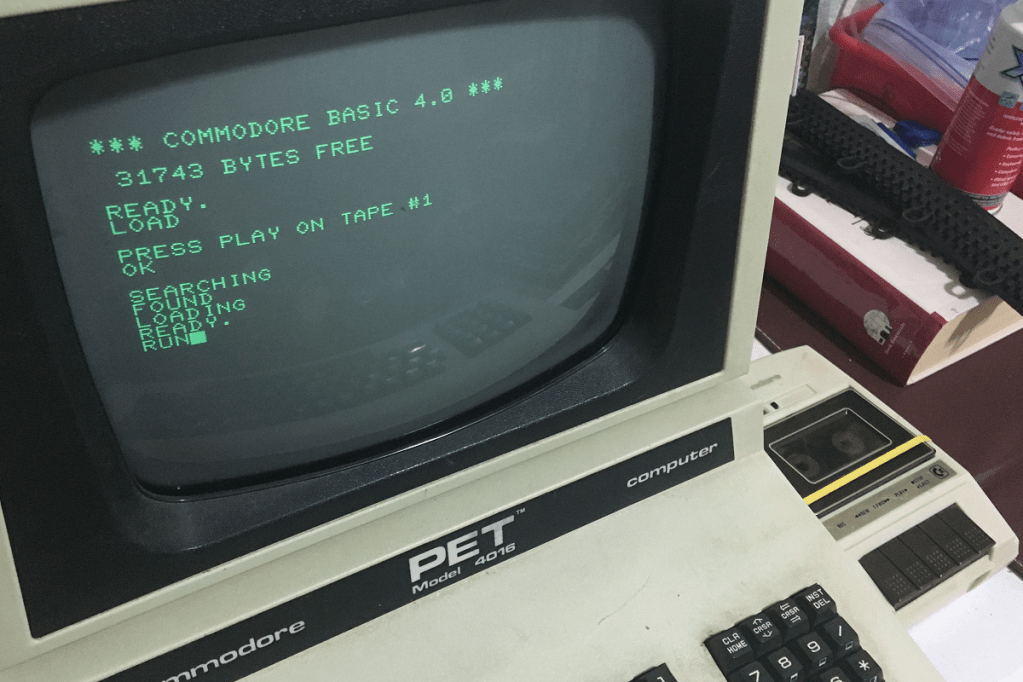
- Once the Commodore screen says “READY.” issue the RUN <RETURN> command to begin running the program that was loaded! Also, press STOP on the cassette reader since the loading is complete (you can also RWD the tape now while the power is on, to have it ready to load again for the next time).
- Congratulations! You are now qualified to travel back to 1977! Be aware that they called the tape-deck a “Datasette.” And you ask about WiFi, they’ll assume you meant HiFi and are talking about audio speakers.
NOTES about creating the TAP file: After loading DHUNTERPET.PRG using SD2PET, I then did SAVE “DHUNTERPET” to record the data to a tape. Once completely saved, then I used a device called “Commodore 1530USB Datasette To PC Adapter C2N Tape Recorder Tapuino C64 VIC20” to connect the Commodore cassette to a modern PC through USB. That device required some setup and use of Audacity to perform a WAV recording. The two Datasette players I have did not produce the same volume, but I ended up using the newer Datasette that (per Audacity) was only producing to about 0.6 level volume. Then I used WAV-PRG (and corresponding Audiotap) to convert the WAV to the TAP file. I did NOT “clean” the resulting TAP file, since it was recommended to me to NOT do so for Commodore PET data. The WAV file is too large to be hosted, but there are tools for converting the TAP to various audible file formats, so one can “hear the data.” I am able to host an MP3 of the audio (not verified if the quality is sufficient to produce a PRG or write to a tape, but it gives an idea of what the “data sounds like”). The recording is approximately 9 minutes long! For a 32K program, this means a data-rate of approximately 60 bytes per second (32000 / 540).
TAPClean and TAPStudio alternative here.
