
Instructions for Apple ][ Version
UPDATE: Major updates June 1st, 2021 on the DH Apple ][ build (added joystick and sound support, improved symbols and game balance)
DOWNLOAD (DSK)
DOWNLOAD (binary)
DOWNLOAD (ZIP)
APPLEWIN LINK
ONLINE EMULATOR LINK
For notes on how to use the Apple ][ joystick with DH, see the CONTROLS document.
It was a dark and stormy day, thunder roared upon the Earth! And so, with nothing else to do that day, I decided to port the DH game over to the Apple ][+ system. I do not have a physical Apple ][ to verify the build with. However, the executable generated does work with either the AppleWin emulator or an online Apple ][ emulator.
Here is an outline of instructions for using both of those methods. If you have a physical Apple ][ (or have interest in a version for the Apple ][ Enhanced), please let me know in the Comments!
OPTION 1: Online Emulator
The online Apple ][ emulator I used to run DH is hosted at VirtualConsoles.com: https://virtualconsoles.com/online-emulators/apple-ii/
I am not affiliated with VirtualConsoles, and there are various emulator options available, but I can say I verified VirtualConsoles worked for me and everything in the DH program functioned as expected. So I think they have a good emulator!
https://virtualconsoles.com/online-emulators/apple-ii/
There are two main steps to getting this running:
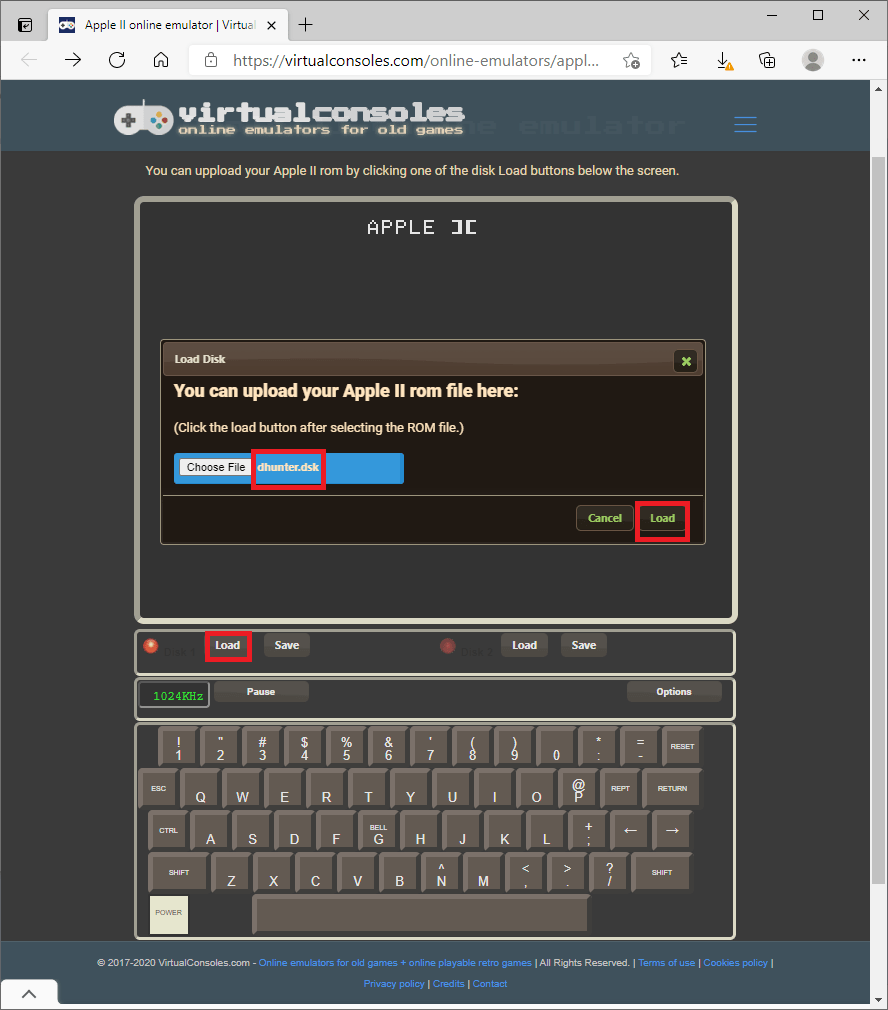
- 1) In the emulator, click Load (above on left side of keyboard), in the dialog box that opens pick Choose File, select your local copy of the DHUNTERA2.DSK file, then click the Load button that is on the file selection dialog.
- 2) Click the POWER button at the bottom left to actually “power on” the emulator.
This LOAD above is sort of like “inserting the disk” into the system. After powering the system on, you still must type a few commands to actually run the program:
CATALOG
BRUN DHUNTERA2
- The first command, CATALOG, just shows a list of the files on the disks and verifies that appears looks correct.
- The second command, BRUN, invokes the DHUNTERA2 program. A2 means “Apple ][” version.
- Please wait a little bit for the program to start, the emulator does emulate the red disk drive light and taking a little bit of time to actually load the program (about 5-10 seconds; if taking much longer then that, there may be an issue with your web browser).
The sequence should look similar to the following:


OPTION 2: AppleWin Emulator
For the Commodore VICE program, they made running PRG files very easy: drag and drop. From that, they queue in the work of attaching tape or disk drives and all the little steps to making the load happen and starting the program. Perhaps AppleWin can also do these things as well (maybe command line options), and there are various other Apple ][ emulators also to try. But my experience was, AppleWin needed a little more effort to get it up and running.
Here is a summary of things that mat help you get AppleWin get setup, keeping in mind it may evolve in time with updates. So these are just some general guidelines as of May 2021:
- AppleWin isn’t installed, but just “uncompress to a folder” and run it.
- I’ve already prepared a DSK file that contains the DHUNTERA2 (A2 for Apple ][) executable. But if you need to prepare your own DSK, or want to create a DSK file that contains maybe a newer update to DHUNTER: The way I did this was I had to obtain AppleCommander (Java) and run it from the command-line like this:
copy master.dsk dhunter.dsk /y
java -jar ac.jar -as dhunter.dsk dhuntera2 < dhuntera2
- The COPY command copies the initial/default master.dsk that is included with AppleCommander, and re-copying just ensures starting with a “fresh media” each time
- The JAVA command runs ac.jar (AppleCommander) with command line options to “import” (stream) the local dhuntera2 (file in the same folder) into that DSK file (like copying that file onto the disk, keeping the name identical between the copies- although you can alter the local or target name to your preference).
- Installing JAVA and making sure the “ac.jar” is available in your path and such can be a bit of a hassle, then also using the command line to navigate to the folders that contain your binary files.
- Frankly, what I ended up doing was just having AppleWin, AppleCommander, and my Apple ][ files just all in the same exact folder.
- “dhuntera2” is my chosen standard filename for the Apple ][ build (binary) of the DH executable program. If you just have the “dhuntera2” executable, there may be other ways to “load” it into the emulator (or the real Apple ][ hardware),
- If you have a physical Apple ][, there is an SD-card drive emulator available (here) that should let you just copy the DH binary to SD, and load it. The price is on par with the similar equipment for the Commodore.
Anyhow, once you a DSK file to work with, start the AppleWin emulator (double click its executable or start from command line).
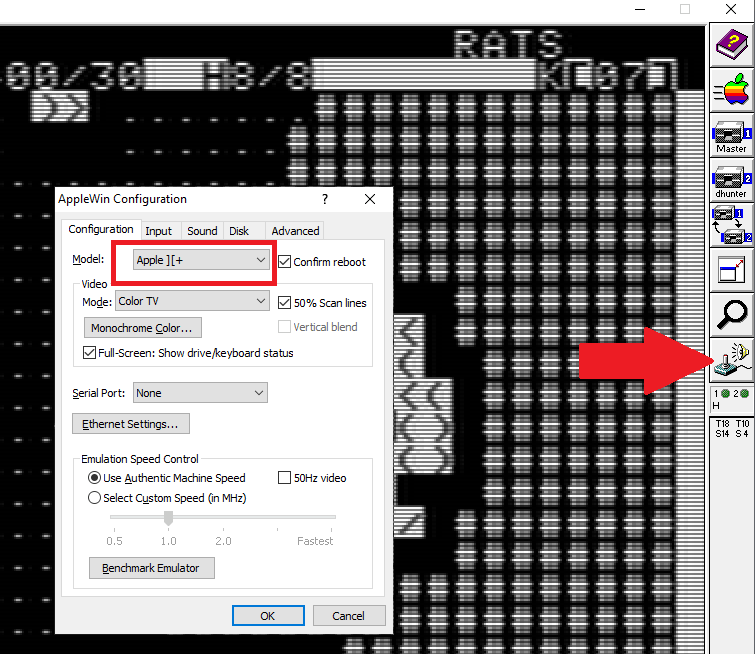
- First check the AppleWin configuration settings. Do this by clicking the “Joystick/Sound” icon on the right side (Settings menu). Make sure the model drop down is set to “Apple ][+”. Technically DH should work with the Apple ][ setting, but there may be additional commands necessary to either load the program from a tape or to initialize some disk drive drivers. Apple ][+ should already have the disk drive support.
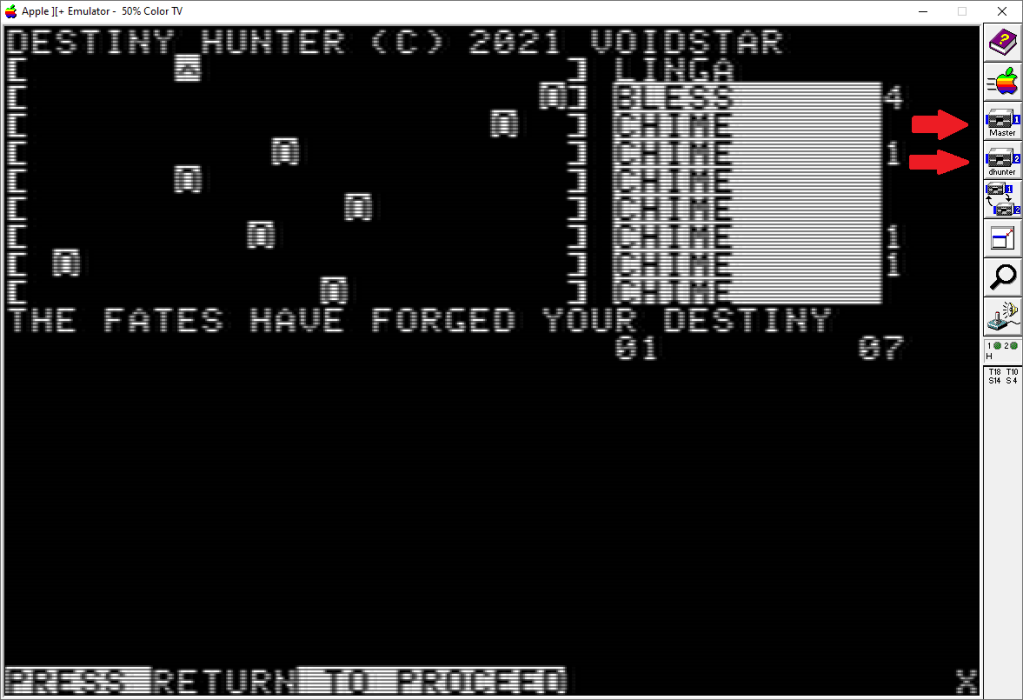
- Next, you need to insert the program into a disk drive. I inserted the original MASTER.DSK into the FIRST drive, and DHUNTER.DSK into the SECOND drive. Do this by clicking the “disk drive” icons on the right side and selecting the corresponding files.
- Once AppleWin is setup, it does a good job at remembering its setting so you don’t have to go through all that again during the next time it is loaded.
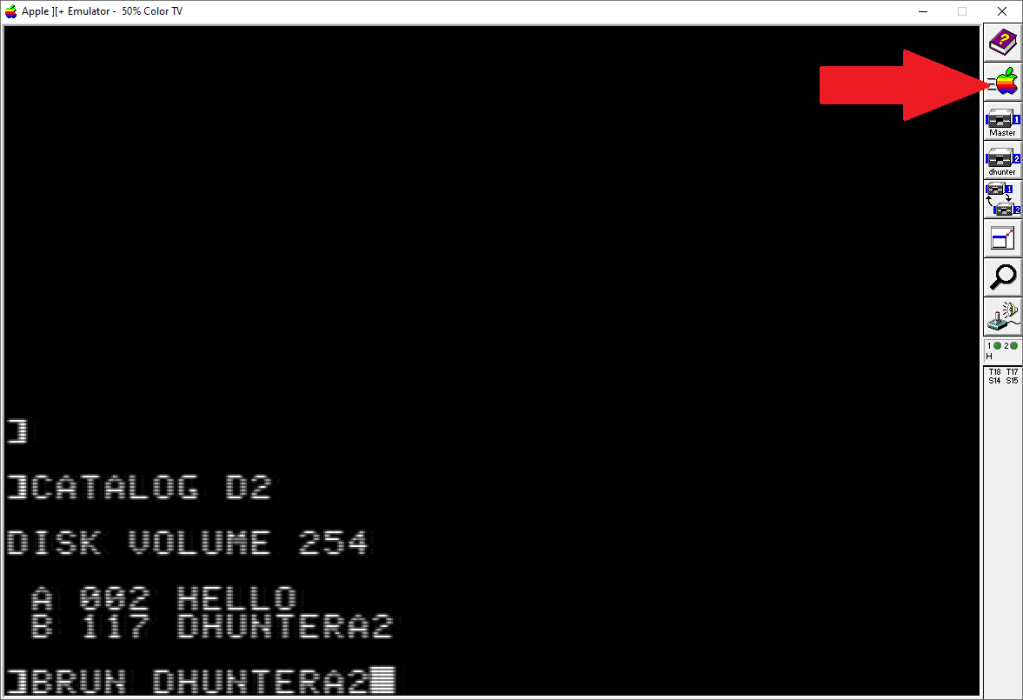
- Similar to the online emulator, you must “power on” the emulator (by pressing the Apple Color logo along the right side). The emulator will “beep” and power up. And two commands are then necessary:
CATALOG D2
BRUN DHUNTERA2
- The CATALOG command just verifies the disk access (D2 means “DISK 2”)
- Use “BRUN DHUNTERA2” to run the actual binary executable of DH from the disk.
- Give a moment for the game to get started.
- Then it’s “Pew Pew Pew” time 🙂

May you receive many BLESSINGs!

